Snare Drum Compression
The snare drum is one of the foundational parts of just about any mix. A weak snare can make your mix sound amateur, which can ruin your track. The question is,
How in the world do these producers and mix engineers get those modern, polished-sounding snares in their drum mixes?
Well, while a great snare drum sound starts at the source, there are tools that you can use to enhance your snare drum once it’s in the box. One of the most important tools for mixing a snare drum is compression.
In this article, we'll cover:
- Whether you should compress snare drum
- How to compress snare drum
- Snare compression attack & release settings
- Punchy snare drum compression settings
- Fat snare drum compression settings
- How to compress hip hop snares
- How to compress EDM snares
- How to compress Rock Snares
Come dive in as we explore how to use compression on snare drums to achieve the snare sound you’ve been after.
Note: This article may contain affiliate links, meaning I would receive a commission - at no cost to you - for any products you purchase.
Should You Compress Snare Drum?
Before you compress your snare drum, ask yourself why you need to compress it.
If you’re dealing with a fat, punchy snare sample, it’s most likely already compressed. Trying to compress it even further will probably just ruin the sound.
Of course, if you’re dealing with a snare drum that needs a bit more punch or sustain, compression can be extremely helpful. Compression can also be a wonderful tool if you need to level out one snare hit to the next. The last thing you want is for that one snare hit that the drummer flubbed on in the hard-hitting chorus to distract the listener.
How Do You Compress a Snare Drum?
The way in which you choose to compress a snare drum depends on the song. In a heavy rock song, it’s not uncommon to compress a snare drum anywhere from 5-10dB to get that thick smack and pop that it needs to cut through a wall of guitars.
On the other hand, if you’re mixing a jazz record and you’re dealing with a soft, roomy snare, you might only want to compress it a few dB to keep any peaks from popping out.
Of course, the two most important things to consider when compressing a snare are the attack and release settings.
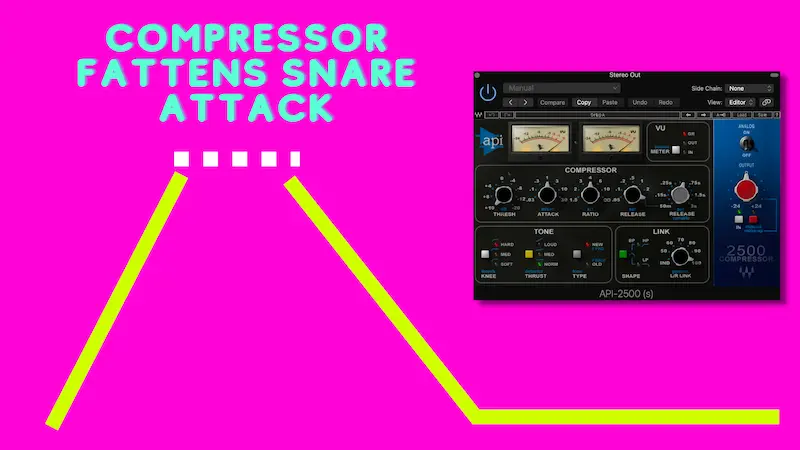
Reducing the attack of the snare (by using a fast attack setting on a compressor) lets you turn up the tail, creating a "fatter" sound
Snare Compression Attack & Release
Like I said before, the way you set your compressor will depend on the style of the song.
However, most commonly, engineers use slow attack and fast release settings when compressing snares, as the slow attack allows the snare’s transient to cut through. All the while, the release maintains the natural decay of your snare. With these attack and release settings, you can take a slight bit of edge off the snare’s transient while maintaining its punch and energy.
If you pair that slow attack with a slow release, however, you can still allow the transient energy to poke through while controlling and attenuating the snare’s decay.
On the other hand, if your snare’s transient is too harsh, you can use a fast attack to tame it. Pair this fast attack with a fast release, and you can bring out the resonance of the snare. On the other hand, if you combine that fast attack with a slow release, you can shorten your snare sound and control the resonance. Think of those pillowy, 70s-style snare drums.
Remember to consider the song style. A funk or hip-hop track might need an ultra-tight snare, while a massive rock ballad might call for a snare that fills out a stadium.
Punchy Snare Drum Compression Settings
To get a punchy snare sound with compression, you want to use a fairly slow attack with a fast release. Remember, you want the transient of the snare to pop through. If the attack is too fast, it will clamp down on the transient and attenuate the punch.
Slowly turn the attack faster until your snare begins to sound dull. Once you get to this point, dial it back just slightly to keep it sounding crisp. Now, begin adjusting the release time so that the needle bounces back and forth with the timing of the track.
In terms of ratio, we recommend going with 3:1 or 5:1, which will help maintain punch.
Fat Snare Drum Compression Settings
For a fat snare drum, you’re going to start with the same settings that you use for your punchy snare drum. Keep the attack pretty slow (somewhere between 20-30ms will do). For the ratio, start with a 5:1 setting.
The main focus when trying to obtain a fat snare drum sound is the release. For starters, set your release anywhere from 80-125ms. If your snare doesn’t sound long enough for your taste, you can lengthen the release.
If you have a compressor with a knee setting, use a softer knee. A soft knee will allow the compressor to base its compression on how hard the snare drum hits.
Best Compressor for Snare - CompFET 76
The CompFET 76 is Arturia’s emulation of the famous Universal Audio 1176 compressor, which is known for its ultra-fast attack and release settings, as well as its colorful, saturated FET sound. If you’re looking for a compressor that can make your snare pop, this is it.
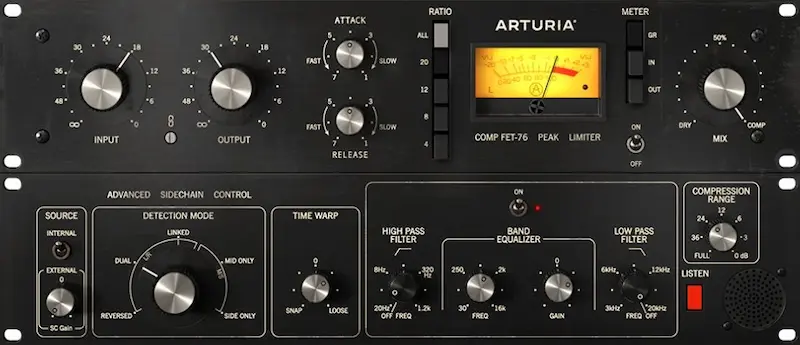
The CompFET 76 has attack times down to 20 microseconds, which is why it acts as such a great peak leveler. If you need to even out the dynamics of a drum performance, it can do the job better than many other compressors.
The release time on this compressor changes based on the input signal. When applying heavy compression, the release is slower, and when applying moderate compression, the release is faster. Thanks to this unique algorithm, you can apply huge amounts of compression without unwanted pumping.
Whether you need to add brightness, presence, or tame transients, you can craft unforgettable drum sounds with the CompFET 76.
How to Compress Hip Hop Snares
Most heavyweight hip hop producers use ratios from 4:1 to 7:1 when compressing their drums. Depending on the sound of the snare, compression settings can range from 10dB and up. The amount of snare compression you’ll need will depend on the sample.
If you’re crafting an old-school hip-hop track with acoustic drum loop samples, you’ll need much heavier compression to keep the drums hitting hard. Of course, if you’re using a single modern trap snare drum sample, you may not need to compress it at all.
How to Compress EDM Snares
While EDM snares vary widely, let’s talk a bit about classic, hard-hitting, festival-style EDM snares. These snares are MASSIVE, often filling up the entire spectrum of the mix. To get a great EDM snare sound that hits hard, you need to leave the attack slow enough to allow the transient to come through and lengthen the release so that the sustain of the snare increases.
How to Compress Rock Snares
When compressing a rock snare, the goal should be to keep it even throughout the entire performance, all while maintaining the necessary punch and sustain. While attack and release settings will vary based on tempo and style, you can typically start with a fast attack and slow release.
Ratios of 2:1 or 4:1 are great for rock, though we don’t recommend compressing your snare more with more than 6dBs of compression. If you need more punch, we recommend using parallel compression instead, which will maintain the raw dynamics of the sound while blending in that punchy, squashed sound to give you added punch.
If you want to learn more about drum compression in general, check out this article on 9 powerful drum compression techniques.
Learn more about Mixing with Compression
This is only one part of mixing with compression! Luckily, I've put together a bunch more articles to help you master this crucial mixing skill!
- How to Use a Compressor: Learn to Mix with Compression Quickly!
- Sidechain Compression Explained for Beginners & Key Settings
- 3 Tips for Using a Sidechain Compressor to Add Punch & Clarity
- Multi-band Compression Tutorial for Great Vocals, Drums & More!
- How to Use Mid-Side Compression for Amazing Recordings!
- How to Use Parallel Compression for Powerfully Punchy Mixes
- Should You Compress Reverb? The Real Answer Finally Revealed.
- The 5 Types of Compressors (And Exactly When To Use Each)
- 10 Vocal Compression Mixing Tips (Including Best Settings)
- 9 Powerful Drum Compression Techniques for Punchy Pro Mixes
- Loud, Punchy Kick Drums with these Compression Settings
- How to Compress Snare - Use *These* Settings Punchy Snares
- Exactly How to Compress Bass for Tight Low End Thump!
- How Compress Acoustic Guitar Perfectly, Every time
- How to Compress Synthesizers: Best Compressor Settings for Synths
- How to Compress Organ: 4 Steps to a Great Mix!
- How to Compress Percussion: Compression Settings for Everything
- How to Compress Strings: 8 Magic Settings You Need to Know
From a Frustrated Producer in a Ragtag Bedroom Studio to Major Placements on TV Earning $1,000s!
My name is Evan, and I've been making music since around 3rd grade. I'm from San Diego, California, but I've lived in Washington, DC for the last 20 years.
While I still have a full-time day job, I have created systems that have allowed me to produce dozens of songs a year in my spare time.
My songs have been on Netflix, TV shows like the 90 Day Fiance, an award-winning indie film, and NPR’s “All Thing Considered.” They've also been streamed millions of times.
In addition to being a music producer, I am passionate about teaching people how they can make professional-sounding music and earn money licensing it, all in their spare time.
Thousands of musicians, like yourself, have trusted me to guide their musical journey. My YouTube videos have been watched nearly a million times. And my story has been in Forbes, Side Hustle Nation, and the Side Hustle School.


EQ is the most essential tool you have for making music sound clean, clear, and professional. In this book you'll learn how to use the R.O.S.E. System, a simple 4-step EQ formula to help you master the world of EQ
